With the AMS you have the ability to move away from the standard emails being sent out from WooCommerce. This presents a great way to have nicer order notifications and better tracking using the AMS.
Today we will focus on how this can work using MakeWebBetter Mautic WooCommerce Integration.
Assumptions:
- You have the purchased plugin installed on your wordpress site.
- You have authenticated it with your instance of the AMS
- You have granted permissions for the product to create all custom fields inside your AMS.
Firing It All Up:
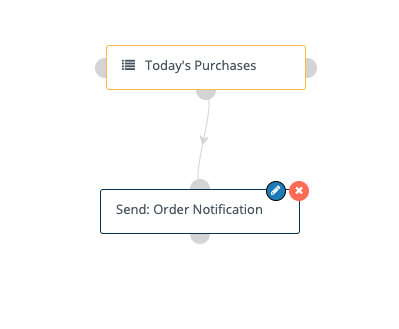
- Create a segment that will capture all current orders. In order to do this go ahead and create a new segment – we called ours Today’s Purchases.
Inside this segment add the filter mwb_last_order_date “greater than” – 1 days
Add a filter tag = purchased-now
- Create a new Template Email. Inside this email you can call all the custom fields pertaining to the particular order. An example would be something like:Hi {contactfield=firstname}Thanks for your order!
We are excited to ship the following products you purchased: {mwb_last_products}.Just to confirm the following details:
Your order will be shipped to:
{contactfield=mwb_ship_add_line_1}
{contactfield=mwb_ship_city}
{contactfield=mwb_ship_post_code}
{contactfield=mwb_ship_country}The current status of your order is: {contactfield=mwb_last_order_stat}
The above is an example, however there are so many fields you can actually call inside your mailer. You can even add in images of the products purchased
- Go ahead and create your Order Campaign.
- Begin the Campaign with the segment we just created.
- Add in Send Mail Action.
- Add in the mailer you just created. Make sure to set to send immediately.
- Add an action to remove the tag “purchased-now”. This will allow you to process multiple orders for the same user in one day.
- And you are good to go

If something doesn’t make sense feel free to write questions in the comments section below.